mySAPplanet
Wednesday, April 22, 2009
SAP LSMW Data Migration for XK01 Transaction
You can create lsmw for data migration as follows (using session method):
Example for xk01 (create vendor)
Initially there will be 20 steps but after processing 1 step it will reduced to 14 for session method.
1. TCode : LSMW.
2. Enter Project name, sub project name and object name.
Execute.
3. Maintain object attributes.
Execute
select Batch Input recording
goto->Recording overview
create
recording name.
enter transaction code.
start recording
do recording as per ur choice.
save + back.
enter recording name in lsmw screen.
save + back
Now there will be 14 steps.
2. MAINTAIN SOURCE STRUCTURES.
Here you have to enter the name of internal table.
display change
create
save + back
3. MAINTAIN SOURCE FIELDS.
display change
select structure
source_fields->copy fields.
a dialogue window will come .
select -> from data file
apply source fields
enter No. of fields
length of fields
attach file
save + back
4. MAINTAIN STRUCTURE RELATIONS
display change
save + back
5. MAINTAN FIELD MAPPING & CONVERSION RULE
display change
click on source field, select exact field from structue and enter
repeat these steps for all fields.
save+back
6. MAINTAIN FIXED VALUES, TRANSACTION, USER DEFINED
execute
save + back
7. SPECIFY FILES.
display change
click on legacy data
attah flat file
give description
select tabulatore
enter
save + back
8. ASSIGN FILE
execute
display change
save + back
9. IMPORT DATA.
execute
display change
save + back
10. DISPLAY IMPORTED DATA
enter ok, it willl show records only.
back
11. CONVERT DATA
execute
display change
save + back
12. DISPLAY CONVERTED DATA
execute
display change
save + back
13. CREATE BATCH INPUT SESSION
tick keep batch input folder
F8
back
14. RUN BATCH INPUT SESSION.
sm35 will come
Object name will be shown here
select object & process
SAP LSMW Concept
LSMW read documents and convert the contents to the target structure and the corresponding fields.
Then the data from the target structure create a SAP format of the document, this document can be used to transmit data.
SAP did not provide any standards conversion.
Steps:
- Read file (local or server, and we need to accept pre-defined data source structure).
- Save the contents of the documents as LSMW documents.
- Define the relationship between the structures and fields distribution .
(as defined in the source and target structure mapping).
- Define source fields and the value of the target fields conversion rule
(LSMW file how to change the definition of target structure)
The above structure and the conversion rule defined are executable in ABAP procedures and generating SAP format documents in the transfer process or LSMW in implementation.
LSMW support of the transfer methods:
- Standard transfer process (batch input, call transaction, direct input).
- IDocs
- BAPI
- Recording SHDB and generate batch input.
STEPS :
1. Go to LSMW
Maintain object attribution
2. Maintaining the original format
- Maintain source Structure
- Maintain source fields
3. Maintaining the original format and objectives of the mapping relationship between format
4. Maintain structure relations.
5. Maintain field mapping and conversion rules.
6. Maintain fixed values, translations, user-defined routines
Achieve the original data -> objective data format
7. Specify files
8. Assign files
9. Read data
10. Display read data
11. Convert data
12. Display converted data
Upload the target format data to SAP
13. Create batch input session
14. Run batch input session
SAP SPRO Chart of Accounts & Company Code
Though you can have multiple Charts of Accounts in SAP,
company codes are assigned to only one chart of accounts.
This is done in configuration (SPRO)
(T-code: OB62 - Assign Company Code -> Chart of Accounts).
T-code: F.10 - Chart of Accounts
Report of accounts in a chart of accounts.
Lots of ways to limit your results, but can’t limit by Company Code!
You will definitely want to limit by chart of accounts.
T-code: OB62 - Assign Company Code -> Chart of Accounts
T-code: OBY2 - Copy Company Code: G/L Accounts
When creating a new Company Code, just assigning it to a
chart of accounts in OB62 doesn’t automatically create those
accounts for the new company code.
i.e. you won’t be able to post any entries until you’ve created the
accounts for the company code.
OBY2 lets you copy all of the accounts that were created for
another company code to your new one.
GL Postings are assigned to only 1 company code
You can do “cross-company code” postings
(i.e. DR CoCde A and CR CoCde B), but SAP will automatically
generate the off-setting entries within each company code so
that their books stay in balance (debits = credits).
There is config around Intra-company postings to determine
where you want those offsets to go.
T-code: FS00 - Edit G/L Account Centrally
This is usually the preferred t-code for manually creating GL
Accounts since it allows you to create both the chart of accounts
piece and the company code pieces.
In FS00, you may need to create an account for multiple company
codes. This can be done by changing the CoCde and using the
“Create with reference button” in FS00.
T-code: FSS0 - Edit Accounts in Company Code
FSS0 allows you to edit just the Company Code (CoCde) portion
of the GL Account.
T-code: FSP0 - Edit Account in Chart of Accounts
FSP0 allows you to edit just the Chart of Accounts portion of the
GL Account.
Consolidation Chart of Accounts - Hierarchy Display
CX16 allows you to create/edit financial statement items
(FS Items) and their hierarchy for the Consolidated Chart of
Accounts used in the EC-CS consolidation system.
SAP :Build a Form with SMART FORMS
Enter a name of a new Form to be built with SMARTFORMS and press the Create command button.
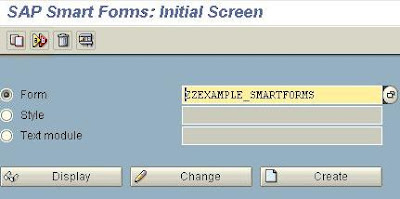
The Form Builder appears on the screen.
Any node can be selected or expanded from the left hand side tree menu.
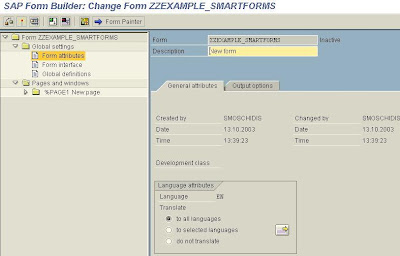
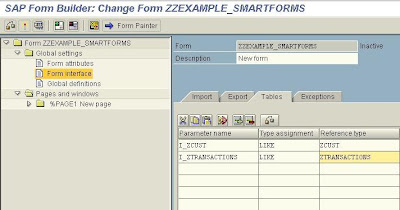
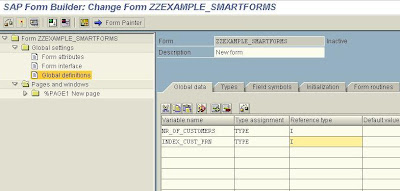
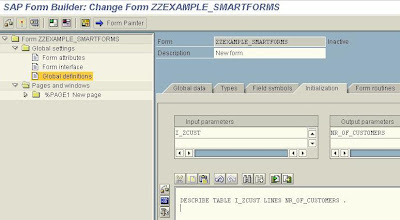
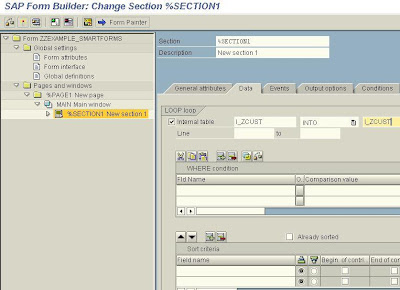
On the Global Attributes tab of the Text Element type the fields of the internal table we wish to show on the form enclosed in ampersands. The Text node is Appended directly (check the relevant radio button).
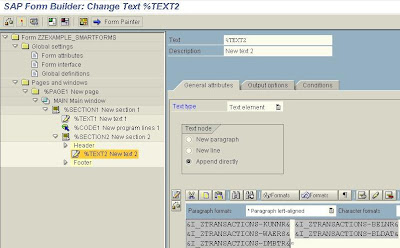
Drag the %Command1 created and drop it on the %Section2 node.
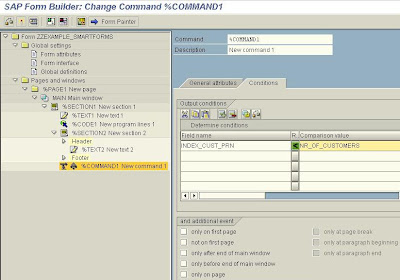
Select the Conditions tab of the Command element an set the condition that a new page is created if the last customer is not reached by the printing process (I e the Index of the Customers printed is less than the Number of Customers).

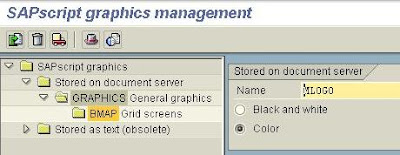
On the appearing popup window provide the path where the bitmap image is stored and check the checkbox stating that Resides in the Printer Memory.
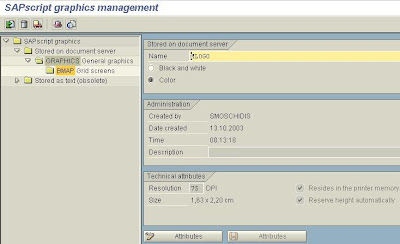
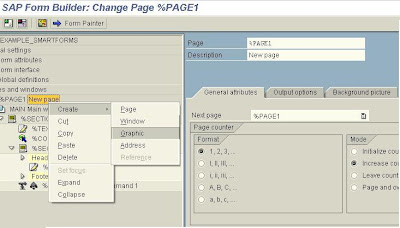
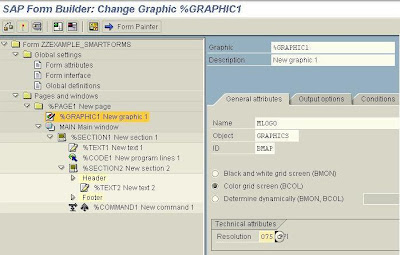
Further reading in the SAP Library on link http://help.sap.com/saphelp_46c/helpdata/en/a9/de6838abce021ae10000009b38f842/frameset.htm. Or through the path Basis Components -> Basis Services / Communication Interfaces (BC-SRV) -> SAP Smart Forms (BC-SRV-SCR) .
SAP EDI Inter-Company Billing - Automatic Posting to Vendor Account
Automatic posting to vendor account is done by EDI. In our case where both companies
are proccessed in the same system (& client), it is sufficient to create Idoc.
This proccess requires several steps:
1. Creating a Customer to represent the receiving Company.
2. Creating a Vendor to represent the supplying company.
3. Creating a Port
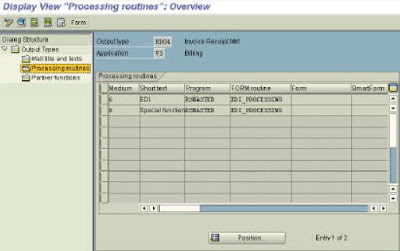
4. Maintain an Output Type
5. Creating a Logical Address
6. Creating a Partner Profile for both Customer & Vendor
7. The relevant MM customizing is maintained.
8. The relevant FI customizing is maintained.
1. Creating a Customer to represent the receiving Company.
The customer has already been created (XD01) for the purpose of Intercompany
processing and entered in the approperiate transction in customizing (Sales and
Distribution à Billing à Intercompany Billing à Define Internal Customer Number By
Sales Organization).
Note: The cutomer has been created in the supplying company code.
The organizational data in this case is:
Supplying Company Code: 1180
Supplying Plant: 1180
Supplying Sales Organization: 1180
Supplying Distribution Channel: 01
Supplying Division: 00
Receiving Company Code: 3100
Customer representing the receiving Company Code: P3100
2. Creating a Vendor to represent the supplying company.
The Vendor is created with the standard transaction (XK01).
Note: The Vendor is created in the receiving Company Code. The organizational data in
this case is the same as above.
Vendor representing the supplying Company Code: P1180
NOTE: There is NO need to “connect” vendor to customer in the control screen.
3. Creating a Port
Tools à Business Communication à IDoc Basis à Idoc à Port Definition (T. Code WE21)
Maintain Transactional RFC: (Choose Transactional RFC and press the create icon).
A dialog box will open asking whether you want the system to generate an automatic
name or whether you wish to use your own name.
Port name: Automatically generated
Version: 4.x
RFC destination: PLD (This was defined by the basis people).

Output type RD04 is maintained: Img: Sales and Distribution -> Basic functions -> Output control -> Output Determination -> Output Determination Using the Condition Technique -> Maintain Output Determination for Billing Documents à Maintain Output Types (T. Code V/40).

Sales and Distribution -> Basic Functions -> Output Control -> Output Determination à
Output Determination Using the Condition Technique -> Maintain Output Determination
for Billing Documents.
Maintain output Master Data
Logistics -> Sales and Distribution -> Master Data -> Output -> (T. Code VV31)
5. Create Logical Address
Img: Sales and Distribution -> Billing à Intercompany Billing -> Automatic Posting To
Vendor Account (SAP-EDI) -> Assign vendor. (T. Code WEL1)

receiving Customer (P3100).
Note: If the receiving Customer is a numeric number you must add zeros between the
Company code and Customer number so the Logical Address will be 14 digits.
E.g if the customer number was 3100, than the logical address would have been
11800000003100 as can be seen in the second line.
(In our case the customer is an alpha numeric number so the second line was not necessary. It was created just for this documentation and was not saved)
entered in the detail screen.
IMG: Sales and Distribution -> Billing à Intercompany Billing -> Automatic Posting To
Vendor Account (SAP-EDI) -> Activate account assignment.

6. Creating a Partner Profile for both Customer & Vendor
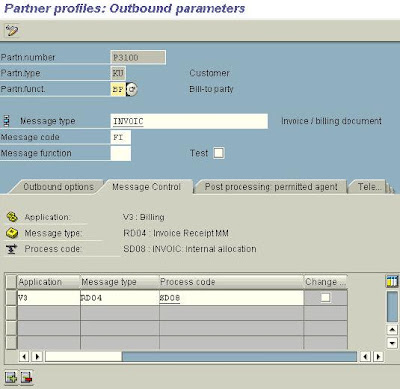
Tools à Business Communication -> IDoc Basis -> Idoc -> Partner Profile (T. Code
WE20)

Put cursor on Partner type KU and press create.
Enter typ, Agent & Lang,
SAVE
Enter the following data in the appropriate fields:
Partn.funct. BP
Message type INVOIC
Message Code FI
Receiving port A000000001
Basic Type INVOIC01
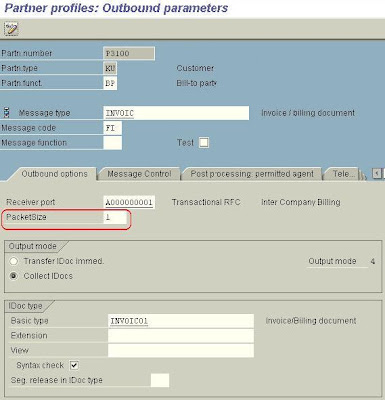
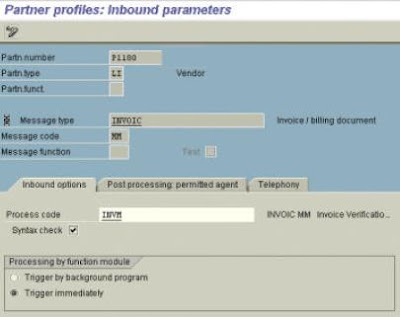
order. in this case enter MM in “message code field.

and output type.
customizing to another output type (in this case RD00)
7. FI CUSTOMIZING
Financial Accounting à Accounts Receivable and Accounts Payable à Business
Transactions -> Incoming Invoices/Credit Memos -> EDI -> Enter Program Parameters
for EDI Incoming Invoice (T. Code OBCE)

G/L account should not be connected to CO. Assign Tax Codes for EDI Procedures (T.Code OBCD) It is necessary to match the output tax from the sales order to the input tax.

Accounting -> Financial Accounting -> General Ledger -> Master Records -> Individual
Processing -> Centrally (T.Code FS00)

G/L account no. = account number that was entered in transaction OBCB (page 24)
Tax category must allow for input tax.
screen).
In many cases the G/L account has been configured so that text is mandatory. This could
be either Header Text or Item Text.
No special configuration is necessary. Just enter text in the “Header note”. You may use
the following access sequence.
It is necessary to implement a userexit in order to fill the item text field. Detailed
instructions are found in note 39503
8. MM Customizing:
Make sure the Unit of Measure’s ISO Codes are configured correctly.
General Settings à Check units of measurement (T. Code CUNI)

NOTE: This is only necessary for logistics invoice verification.
Materials Management à Logistics Invoice Verification à EDI à Enter Program
Parameters

Monitoring
There are several transaction that allow you to monitor the IDoc. First you need to know
the IDoc number. You can see the IDoc number in the processing log in the “Header
output” screen in the billing document.


